Why QuickBooks Error H202 Occurs and the Top Ways to Fix It
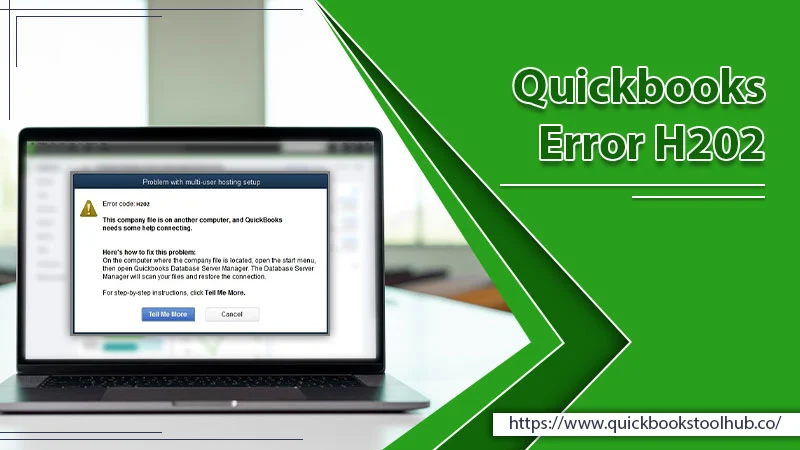
Many QuickBooks users face the H series error code, preventing them from using the software fully. QuickBooks error H202 is a common problem that arises while using the multi-user mode. It also occurs when accessing the company file in multi-user mode. Some of the key reasons for it include wrong hosting settings, incorrect DNS settings, and issues with QuickBooks Database Server Manager. But it is possible to overcome this error by updating QuickBooks Database Server Manager and checking the services on your server. Keep reading to learn more fixes for this problem.
Resolutions for the QuickBooks Error H202
Before using these solutions, back up your QBW file. It will enable you to restore the original information.
Examine for network problems
Check your network by pinging your server from every workstation getting this error code. It is a good way to fix QuickBooks error H202 manually.
- Access the Windows ‘Start’ menu of your workstations and server.
- Launch ‘Network and Sharing Center’ through Windows Search.
- After that, choose ‘Advanced Sharing Settings.’
- Check that you’ve selected ‘Turn on network discovery’ in ‘File and Printer Sharing’ and ‘Network Discovery’ sections.
- Now access the Run command by typing ‘Run’ into the search.
- Now in this window, input ‘cmd’ and press Enter.
- In the CMD window, input ‘ipconfig/all.’
- Press Enter.
- In the Windows IP configuration section, look for the hostname.
- Write it down somewhere after finding it.
- Launch the Run window and input ‘cmd.’
- Hit ‘OK.’
- Ping your server from your system.
- Input ‘ping_server name’ and hit Enter.
- Repeat these steps on every computer getting QuickBooks H202 error.
Verify QuickBooks hosting
Verifying hosting is another way to resolve this QuickBooks error code.
- Launch QuickBooks on the hosting system.
- Choose ‘File’ and tap ‘Utilities.’
- From the dropdown, choose ‘Host multi-user access…’
- If you view ‘Stop hosting multi-user access,’ choose it.
- Exit the company file and tap ‘Yes.’
Check different QuickBooks services.
After verifying QuickBooks hosting, verify QBCFMonitor and QB DBXX services to fix the H202 error QuickBooks.
- You’ll begin by verifying QBCFMonitor and DBXX services.
- Hit the Windows Start icon.
- Run the program by pressing Windows and R keys.
- Input ‘msc’ and press Enter.
- Scroll down till you find QuickBooks DBXX service in the ‘Service’ window.
- If you cannot see it, use the Database Server Manager to get it installed.
- Next, run the entire program on the server.
- Open QuickBooks and check if the hosting is turned on or not.
- In the Window of QuickBooks DBXX Properties, make the ‘Startup type’ automatic.
- Set the service status to running.
- Otherwise, choose ‘Start.’
- Now, head to the ‘Recovery’ tab.
- Select ‘Restart the service.’ choose to restart the service from the dropdown menu of First Failure, Second Failure, and Subsequent Failures.
- Tap ‘Apply’ followed by ‘OK.’
- Repeat these steps for the QBCFMonitor service.
- Now, you won’t notice QuickBooks error H202 when switching to multi-user mode.
Use the QuickBooks Tool Hub
You can also run the QuickBooks Database Server Manager on the server using the Tool Hub and fix this error. It’s best to use Tool Hub on 64-bit Windows 10 to fix QuickBooks error code.
- Exit QuickBooks.
- Find the most recent version of QuickBooks Tool Hub, which is 1.5.0.0.
- Save this file in your Downloads folder.
- Next, open the downloaded file of this utility.
- It will be in the format QuickBooksToolHub.exe.
- Use the onscreen instructions to install the software.
- Double-click on its icon to open it.
- Now, choose ‘Network Issues.’
- Choose ‘QuickBooks Database Server Manager.’
- Inside it, select ‘Start Scan.’
- The QB Database Server Manager will start repairing your firewall permissions.
- When the scan completes, choose ‘Close.’
- Now, open QB on every workstation where you notice error code H202 QuickBooks.
- Choose ‘File’ followed by ‘Switch to Multi-User Mode.’
- Next, select ‘Company File Issues’ in the Tool Hub.
- Pick ‘Run QuickBooks File Doctor.’
- Now, select your company file.
- If you cannot see it, choose ‘Browse’ and find it.
- Choose the ‘Select your file’ option followed by ‘Continue.’
- Input the admin password of QuickBooks and select ‘Next.’
- Consider the issue fixed if the workstations can go into the multi-user mode.
Configure firewall settings for QuickBooks Desktop
You can configure the firewall manually by adding the firewall port exception for QB.
- Launch the ‘Start’ menu of Windows.
- Now open Windows Firewall by typing it in the search box.
- After that, access ‘Advanced Settings.’
- Right-tap ‘Inbound Rules.’
- Now choose ‘New rule.’
- Tap ‘Port’ followed by ‘Next.’
- Ensure to select ‘TCP.’
- In the ‘Local ports’ field, input the particular ports required for your QB year version.
- After inputting the port number, tap ‘Next.’
- Choose ‘Allow the connection’ followed by ‘Next.’
- Ensure to mark all the profiles and choose ‘Next.’
- Make a rule.
- Name it in the format ‘QBPPorts(year).’
- Finally, tap ‘Finish.’
- Repeat these steps to create outbound rules.
- The only difference is that instead of selecting Inbound Rules, you need to choose Outbound Rules.
Read about:- QuickBooks Error 9999
How to Resolve Error Code H202 QuickBooks on Windows Server 2012 Essentials R2
There are a few steps to follow to resolve error H202 on Windows Server 2012 Essentials R2.
- Access ‘Settings’ and choose ‘Systems’ followed by ‘About.’
- Now install QuickBooks Database Server Manager on the server for every QuickBooks version.
- Access the ‘Run’ box and input ‘services.msc.’
- Press Enter and locate the base filtering engine.
- Right-tap it and choose ‘Stop.’
- Now launch QuickBooks Database Server Manager, and choose the folder with the company files.
- Tap ‘Start Scan.’
- After the scan ends, tap ‘Close.’
- Now, access the Run dialog box, and input ‘services.msc.’
- After that, hit Enter.
- Now, on the ‘Services’ list, locate the ‘Base Filtering Engine’ option.
- After finding it, right-tap it and choose ‘Start.’
- If you view an error message, dismiss it and choose ‘Start.’
- On the Services list, locate Windows Firewall.
- Ensure that it has a Running status.
- Exit the window.
Read about:- QuickBooks Error 6000
Why QuickBooks Error H202 Error Occurs?
Some of the leading causes of QuickBooks error code H202 include the following.
- The system firewall blocks the exchange of company data between the server and QuickBooks.
- Wrong hosting settings.
- Unavailability of the IP address of the host to QuickBooks Desktop.
- Key QuickBooks services are not operating.
- The QB Database Server Manager is problematic.
- Corrupt.ND file.
Read about:- QuickBooks Error Code 80040408
Troubleshoot QuickBooks Error H202 Easily!
These methods are tested to help users resolve this technical glitch. Use them exactly as per the instructions, and you wouldn’t face issues in using the multi-user mode in QuickBooks. But if the problem persists, contact a QuickBooks technical support service.
0 Comments